Time for a new Brenda Photo Challenge! The theme is Flip That Photo, picked by the current challenge hostess, Cindra of Knits & Pics & Favorite Things. Thank you, Cindra, for challenging us to stretch ourselves by changing our digital images with photo editing techniques!
Cindra and I provided some tutorial coaching on our blogs during the past two weeks. It will be exciting to see what the participants have learned and will be presenting. I had a grand time teaching myself how to do layers in Photoshop Elements and creating some transformed photo images. I hope my visitors enjoy my entries!
I have three examples to present, all using the same layering technique. In each case, I took one of my photographs and layered it with a decorative background, resulting in a merged and transformed image.
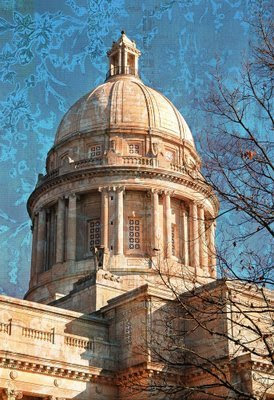
Example #1 – This is a scenic picture I took in November of the Kentucky State Capitol building in Frankfort, Kentucky. By itself, it is a lovely picture, taken on a bright and sunny day. 
But government buildings can be rather stuffy in nature. And there were no pretty clouds in the sky that day, resulting in a static image. So what would happen if I merge this photo with a peach-colored scrapbook paper that has a distressed floral motif? Let’s find out!
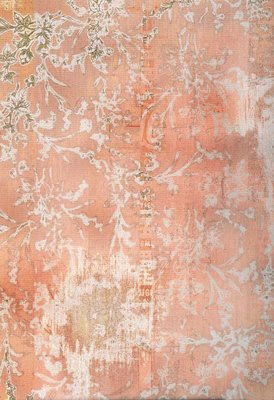
With a hard light layer at 100% opacity, I got a jazzed up image with a bit of surreal flair. Pretty cool, huh?
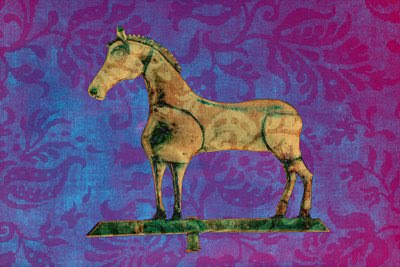
Example #2 – This is a picture of an antique horse weathervane that I took a couple of years ago at the Shelburne Museum in Vermont. The weathervane display was in the Round Barn visitor center, and the lighting was so poor that I had to resort to using a flash. This image is straight out of the camera with no adjustments. I think it has a rather dismal photographic quality, and it was certainly worthy of deleting. But I liked the folk art shape and decided to keep the image in my digital library.
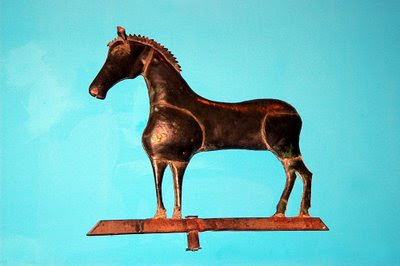
So is there a chance to redeem this particular image by layering it with a textured background? I chose a scrapbook paper image with good tonal qualities and floral imprints which provide some movement.
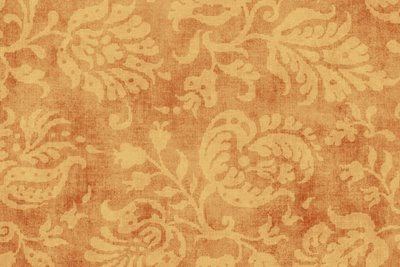
With a difference layer at 100% opacity, look how personality has emerged from this tricked out pony! The combined image turned out way cooler than I would have ever imagined.
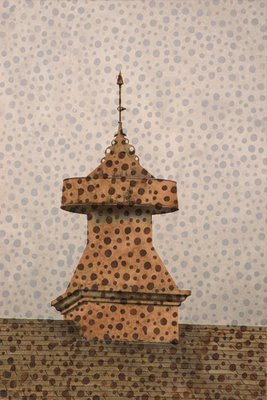
Example #3 – I took this photograph of a barn cupola at the Hancock Shaker Village in Pittsfield, MA. The overcast, rainy sky did nothing to complement the grey structure. Except for the shape of the cupola, this picture is truly dull and boring. Yawn!
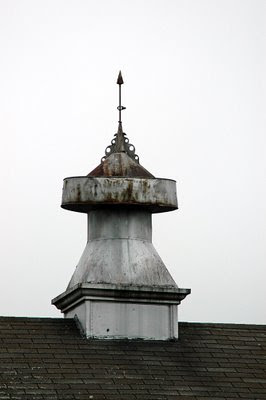
So how can I make this image interesting? If ever a picture needed texture and a little color, it is this one. Fortunately, I remembered a scan I did a while back of a favorite Bali fabric with brown spots. The rest, as they say, is history.
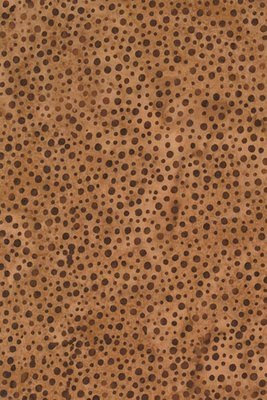
After applying a pinlight layer at 65%, I was blown away when I saw the merged image. It is raining spots on the rooftop cupola! This one makes me giggle because it turned out so incredibly funny!
So, I finally learned how to use layers in the past couple of weeks and carefully thought about how to combine images that can complement each other. And, I was able to transform my photos (two of them very sad, sad pictures) to make them more interesting, unique, and artistic. I loved this photo challenge!


