
Remember the glorious waterfall featured in my May 4th post? This view was on the other side of the road bridge. The water may appear to be flowing upward in the image, but the view is actually of the water flowing downstream. This photo serves as an important reminder about turning around to discover another composition. The scene looked so magical that one might suspect a woodland fairy was lurking right behind that tree!
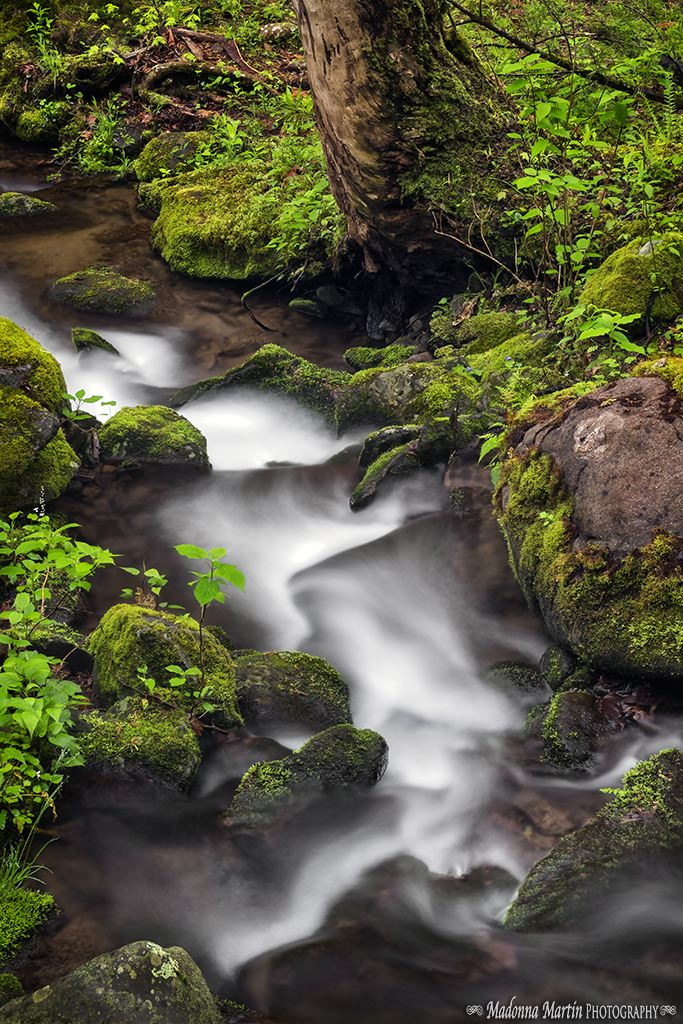
Great Smoky Mountains National Park, Tennessee
My dear friend, Ms. Vee (A Haven for Vee), kindly asked me to offer some tips on how to photograph streams and waterfalls, like this example. I am happy to oblige. The April workshop was the first time I have ever tried the technique.
- An overcast day is best for soft, diffused light. A recent rain offers even better conditions because the foliage and rocks are more attractive when they are wet. Springtime in the Smokies is a prime time for roadside waterfalls. However, the water may be muddy looking if your photo shoot is too soon after a heavy rain.
- A steady tripod is essential because the silky look of the water is achieved by a long exposure. My camera shutter was open six seconds for the image shown above.
- Use a circular polarizer on your lens. Rotate the filter to reduce optical glare in the water and on the foliage. The filter also reduces light to the camera’s sensor, thus requiring longer shutter speeds.
- Use a cloudy white balance setting or else use the auto setting. I use auto white balance the vast majority of the time and make any needed adjustments during editing. In the image above, I selectively warmed up the tree trunk and large boulder.
- Set the camera on aperture priority, and use a small aperture (e.g., f/22).
- Meter the camera’s exposure for the water, which is the brightest part of the scene. Use the histogram reading that is built into your camera! Most of my shots of streams and waterfalls were taken with an exposure compensation of -1 (a full stop underexposed).
- Use spot focusing, about a third of the way into the frame. Check focusing throughout the scene.
- Wait for no breeze.
- Use a remote release or timer on the camera.
- Take several shots to get different movements of the water and in case of possible wind movements.
- Edit with photography software. Don’t be shy about it either! This is landscape photography, not photojournalism. I always work hard to ensure correct white balance; remove objectionable color casts (e.g., blue haze on water); enhance foliage color; add contrast; clone out spots that are distracting; tone down light areas that divert attention away from the subject; sharpen; etc. I use several plug-in filters, such as Nik and Topaz, to augment Photoshop tools. Oh yes, and I shoot in RAW format so that I have the maximum amount of digital information at my disposal!
The water is so beautiful and I love the vivid green. Thank you for the tips, I hope to give this a try some day!
ReplyDeleteOh my! Well that is going to help someone achieve an amazing photo. My camera is a bit limited, but I will try the things I can after the next rain when the ravine is running pretty fair. That was a lot of work to get all those steps noted. I appreciate you!
ReplyDeleteThanks Donna (and to Vee for requesting it!) Just this week I was making a plan in my head about finding some moving water close to me and doing this very thing! This photo certainly has a magical appearance to it...it's just stunning! Thanks for the great tips!
ReplyDeleteGorgeous picture! I could only hope to be 1/10 the photographer you are!
ReplyDeleteThe photo is wonderful, thank you for sharing your knowledge.
ReplyDeleteyou are wonderful! :)
ReplyDeleteThat is a beautiful picture. Looks so peaceful.
ReplyDeleteBeautiful photo! Thank you (and Vee) for this tutorial. It all sounds so complicated to me though. I am hoping to get some camera time with a friend from church who is a photographer and she will teach me about aperture and f stops etc. Then I may try the moving water shots. Thanks for sharing all the tips for this Donna. You are an inspiration.
ReplyDeleteThank you for sharing your tips. The one that jumped out at me is that last one. I am one of those who sometimes feels like I am cheating by changing too much in the editing. Your words, "This is landscape photography, not photojournalism" gave new perspective.
ReplyDeleteSuch another beautiful photo, Donna. I love it.
ReplyDeletexoxo
Thank you! I've always wanted to try this.
ReplyDeleteAll that sounded like Greek to me LOL but it is a gorgeous photo and thank you for sharing, Ms. Donna :)
ReplyDeleteYour photos are always so beautiful! Thank you for sharing these tips. I'm going to try them sometime soon when we have a chance to drive a ways where there are several gorgeous waterfalls. I appreciate you sharing your 'secrets'.
ReplyDelete~Adrienne~
It really does look magical! You are so talented with your photography. Thanks for sharing some of your tips! Sweet hugs, Diane
ReplyDeleteSuch a magical photo...just love it.
ReplyDeleteThank you for the tips...I don;t have a good camera but I appreciate having your tips in case I do have a nice camera someday.
xo
Thank you for sharing these tips. I think I'm going to print this post and tuck it into my camera case for a time when I have some running water to practice on. That might be this summer when we are out boating.
ReplyDeleteI'm a little pleased with myself that I understand most of what you are saying - I wouldn't have understood it even a year ago. And I think that my mirrorless camera can do all of that. I've learned so much from you.
Now if I only had a stream...;o)
ReplyDeleteGORGEOUS Miz Donna......always said you'd make a good teacher! Do some videos!
hughugs
With all of the recent flooding, our creeks are over flowing. I need to take my camera, tripod and this blogpost to the farm and practice!
ReplyDeleteThinking of you; hoping your foot is better
ReplyDeleteand you're able to get around.
xoxo
Oh my... I don't know how I missed this and other posts!! You are not showing up on my reading list. I'll have to find out why.
ReplyDeleteThis is an amazing tutorial. Thank you.
I have been to those spots in the Smokie's and know if you do it right you can get some amazing photos.